Skills Needed

Adaptive Chef Knife

Limited options are available for chefs with arthritis to continue cutting comfortably. Most commonly available knives with adaptive handles offer neither quality blades nor handles strong enough for repetitive usage. Plastic removable handles are difficult to remove and often unreliable.

Design Problem & Solution

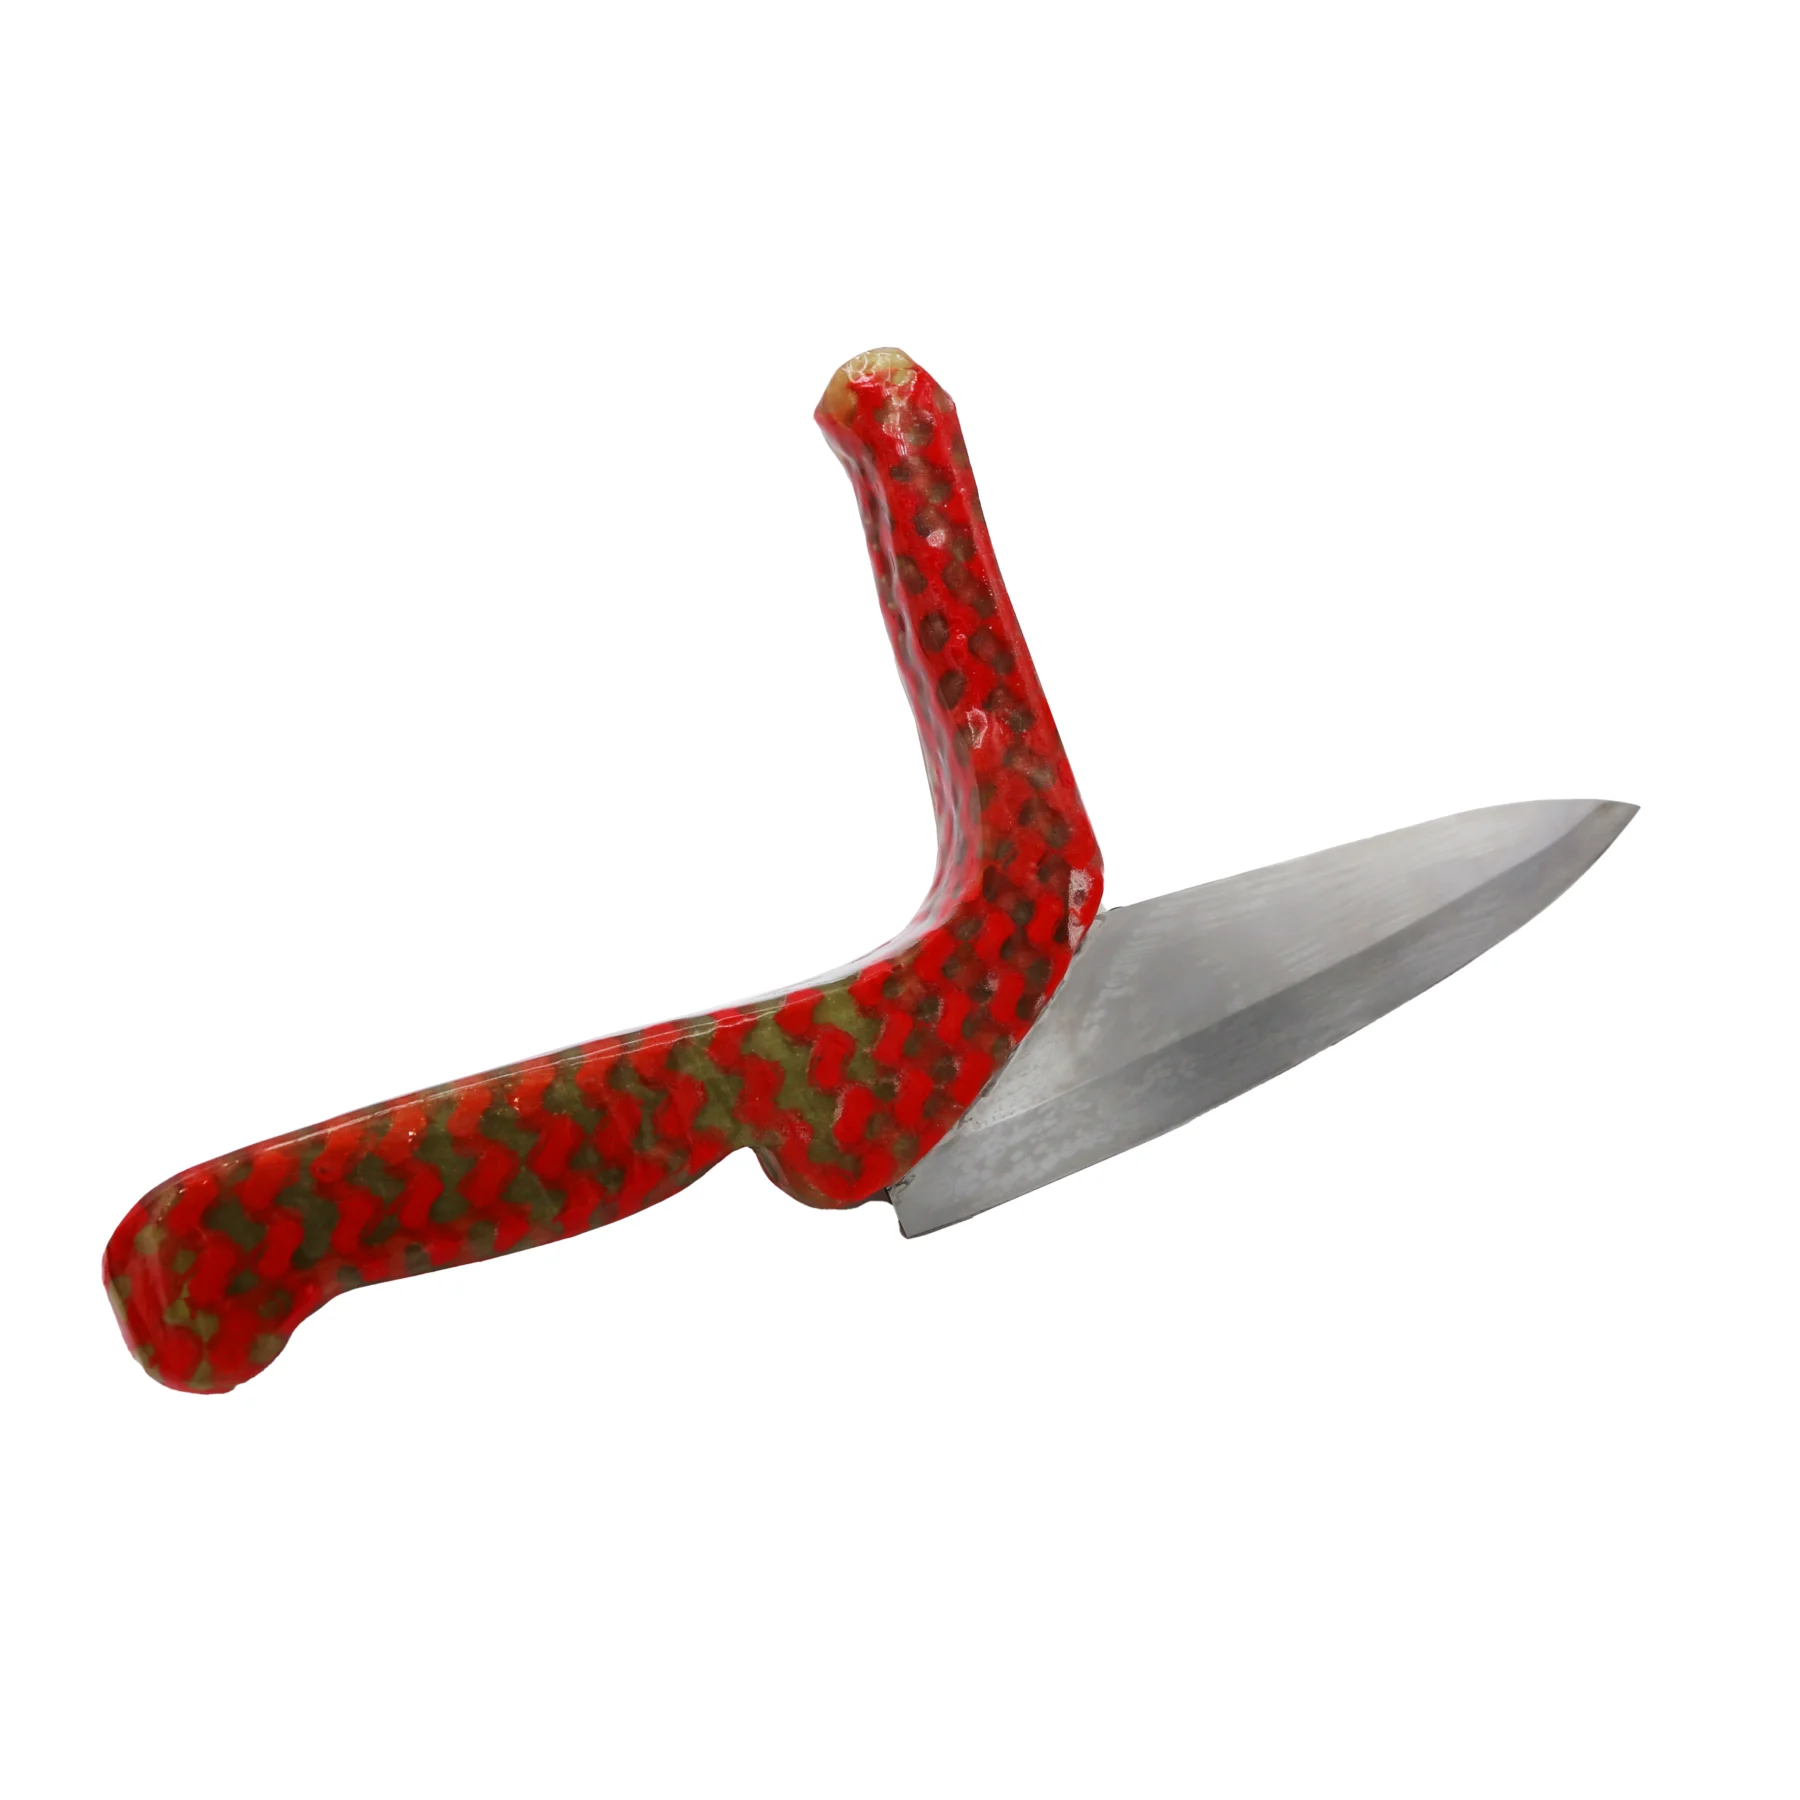
Our Solution: A permanent adaptive handle that can be easily replicated for future clients, combining a strong, high-quality blade with sustainable design.
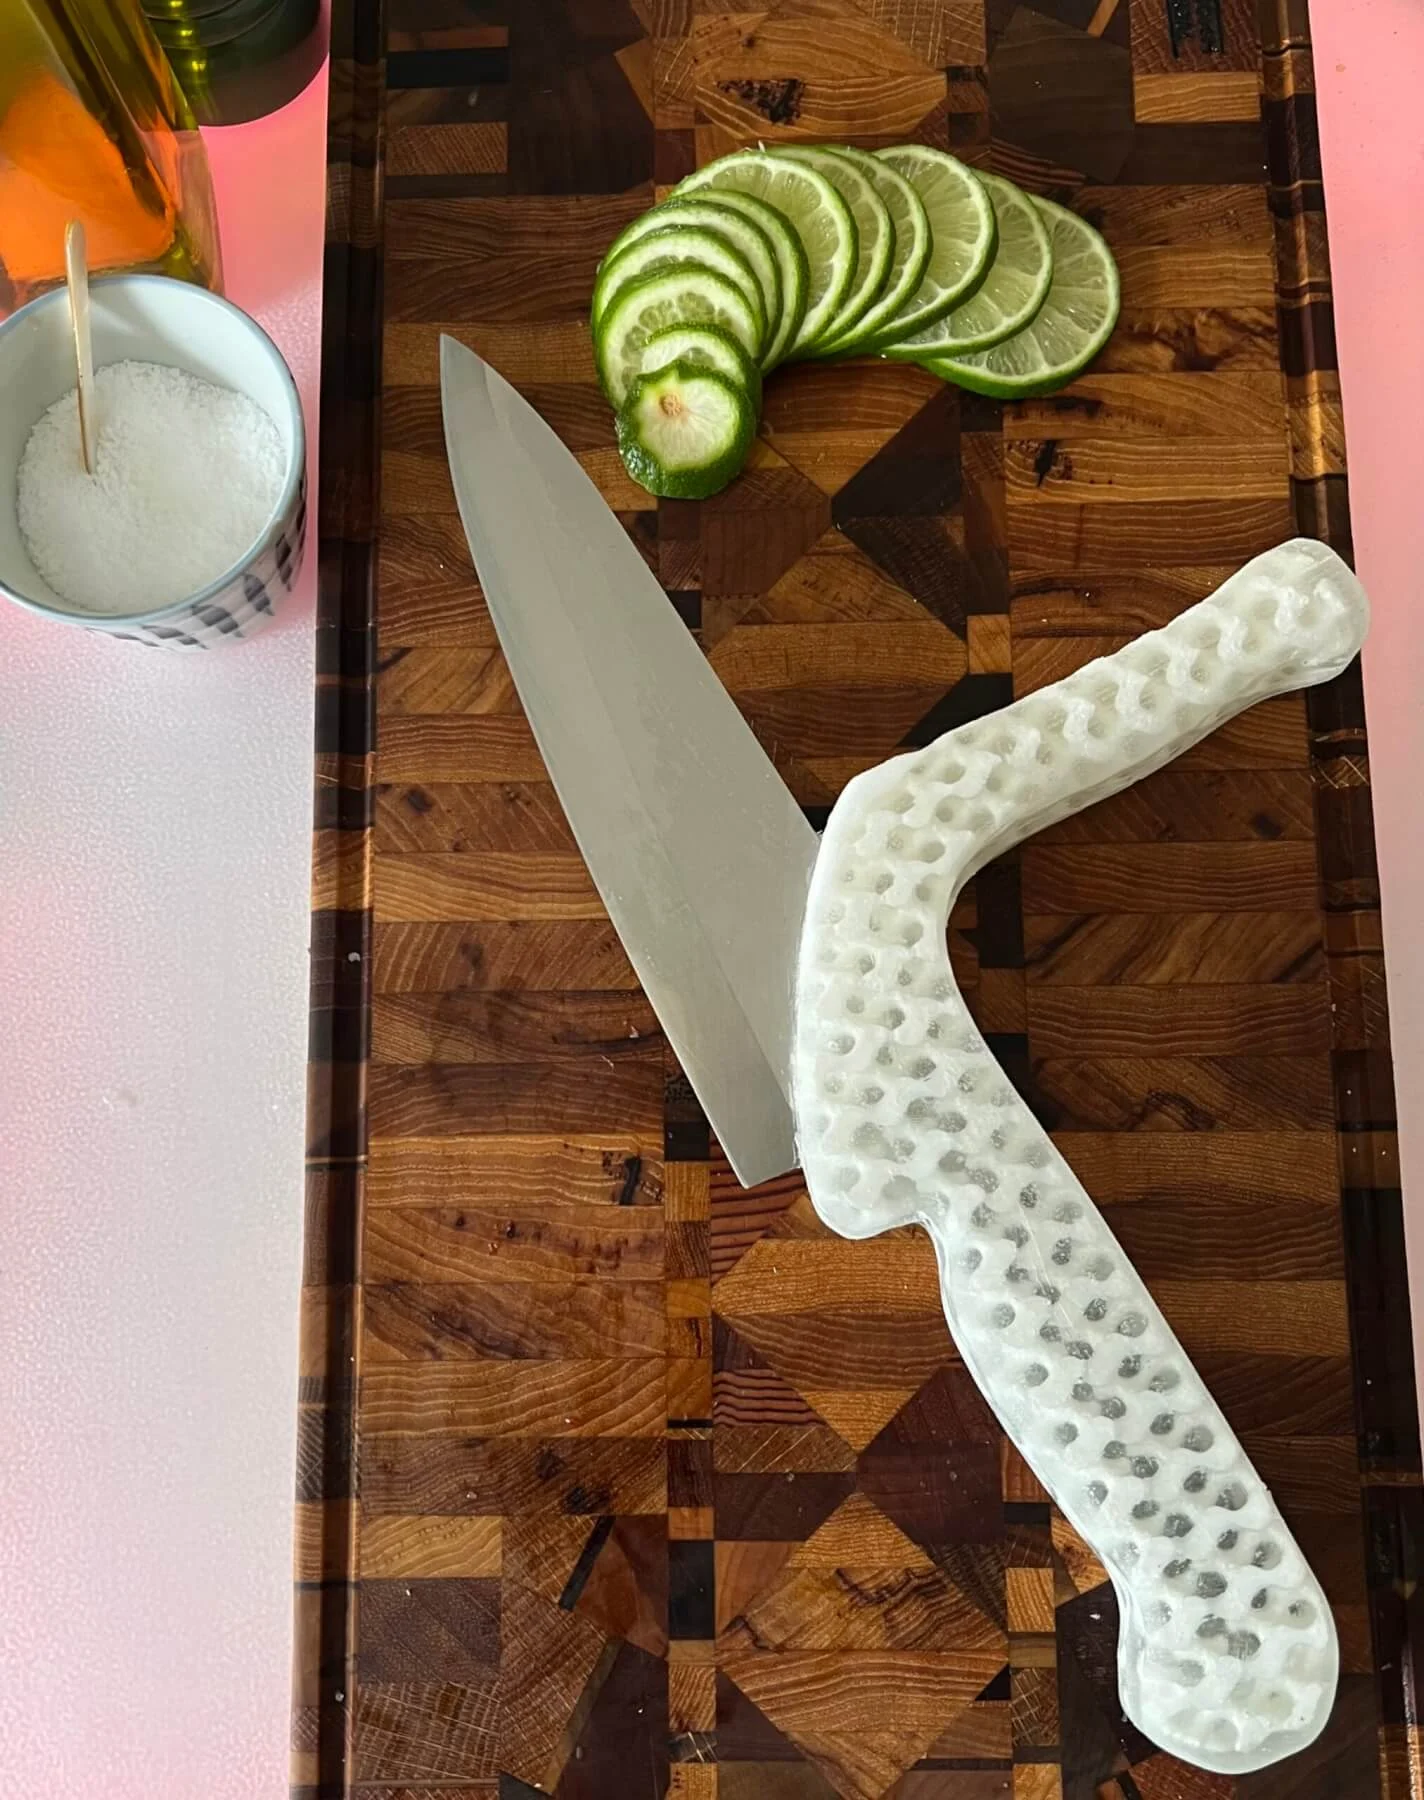
Adaptive Knife

Key Design Features

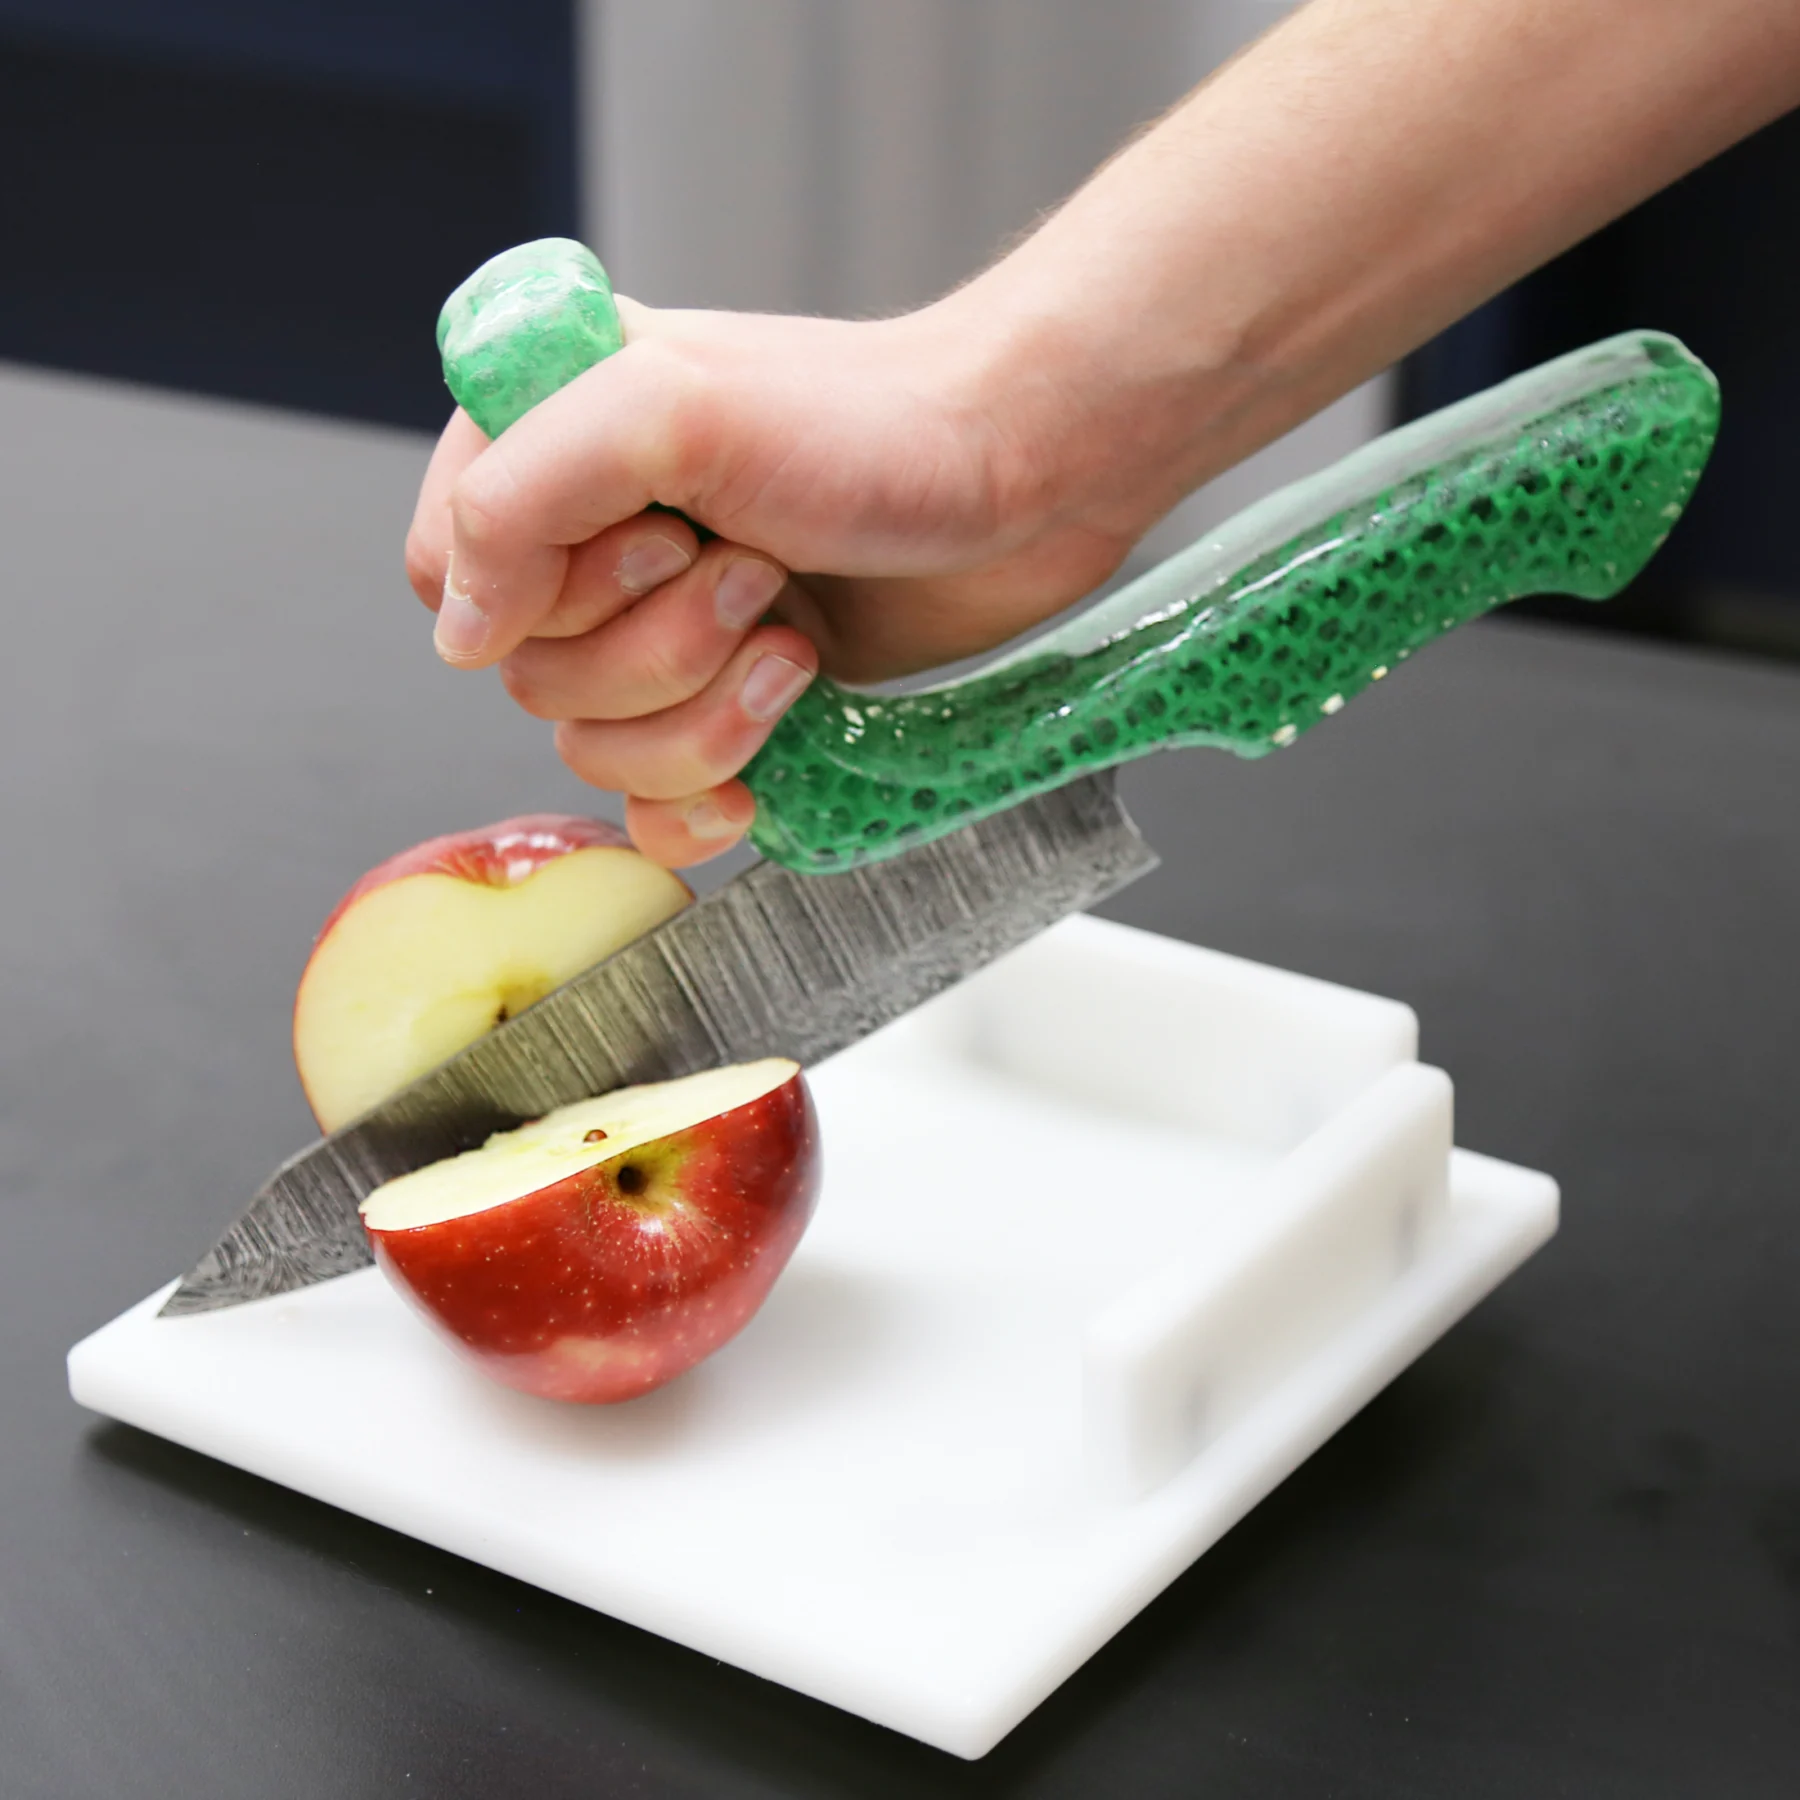
  • Forearm Leverage Handle — positioned along the back of the blade to enable leverage through the forearm rather than relying on wrist strength.
  • Dual-Width Grip — a traditional wider handle section accommodates users needing larger grips for better control.
  • Tessellated Structure — the handle uses a tessellated PLA form to minimize resin requirements while maximizing structural stability.
  • Durable Finish — resin coating creates a smooth, non-porous surface built to last as long as the blade itself.

Bill of Materials

Device Qty Price Per Unit Total Cost
Knife Tang (without Handle) 1 $20.00 $20.00
Handle Form (3D Printed) 2 $0.75 $1.50
Knife Mould (3D Printed) 2 $5.00 $10.00
Vacuum Form Mould (3D Printed) 2 $0.75 $1.50
EVA Inner Mould (Vacuum-Formed) 2 $10.00 $20.00
Weather Stripping 1 $0.20 $0.40
TOTAL COST PER UNIT $53.40

All 3D printed parts available from the IATP Maker Website.

Tools & Equipment Required

  • 3″ C-Clamps (qty: 4)
  • 4″ Vice or Clamp
  • Plastic Bin (for resin)
  • Hot Glue Gun
  • 3D FDM Printer
  • Vacuum/Pressure Former
  • Dremel or File
  • Sandpaper (various grits)

Assembly Instructions

Step 1 — 3D Printing
  1. Download Parts: All parts are available on the IATP Maker Website.
  2. Outer Mould: Print in PLA. High resolution and strength are not required.
  3. Pressure Form Moulds: Print on a dual extruder FDM printer using Varioshore infill with Nylon CF walls. Increase wall layers to 3–5 to resist warping during pressure-forming.
Step 2 — Vacuum/Pressure-Forming

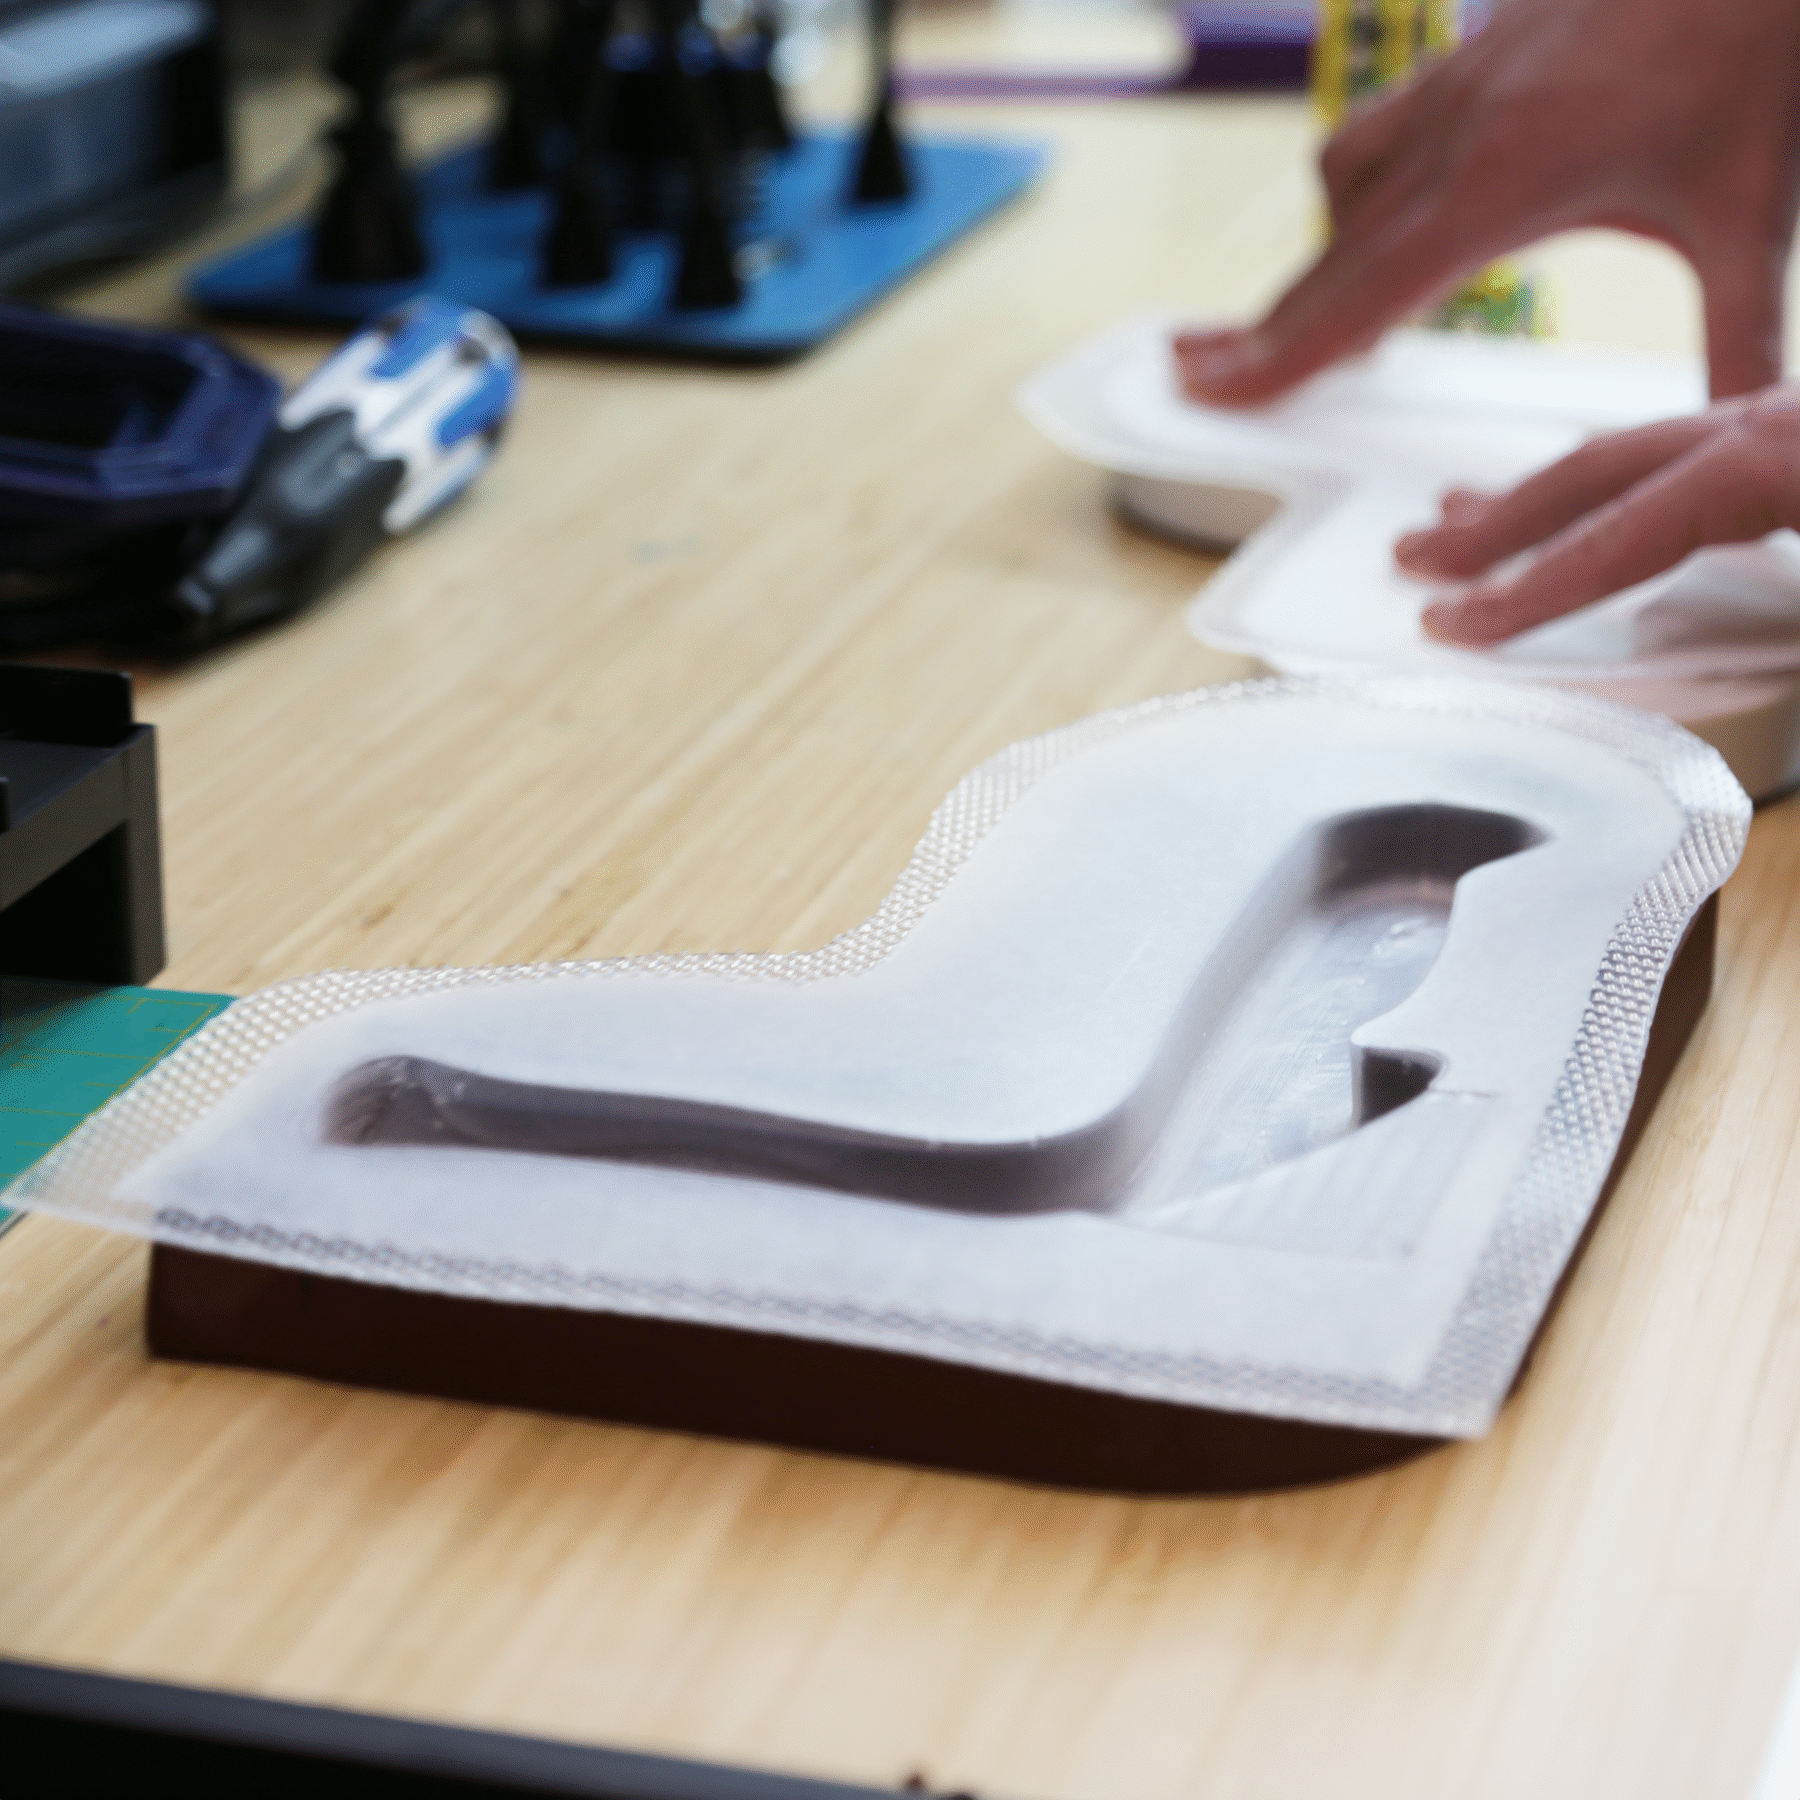
Vacuum forming warms polymer until pliable, then uses vacuum to mold it around an object. Since heat dissipates through the mold on contact, use materials stronger than PLA for Pressure Form Moulds.

  1. Equipment: We used a Mayku Multiplier pressure former with EVA to create a flexible, removable inner mold.
  2. Pressure Settings: The Multiplier exerts 60 psi / 4 bar of pressure, producing highly detailed molds.
  3. Why This Method: Compared to silicone molds, this approach allows rapid design iteration with an easy-to-replicate template.
Step 3 — Resin Casting
  1. Prepare First Side: Place weather stripping along the channel on one side of the outer mould.
  2. Insert Flexible Mold: Fit the EVA mould into the outer mould with the weather stripping in place.
  3. Insert Handle Form: Place the corresponding knife handle form into the EVA mould.
  4. Hot Glue Seal: Before inserting the knife tang, run a bead of hot glue along the EVA where the handle will meet the blade. Position the knife tang and run a second bead along the exposed blade side. Hot glue prevents resin leakage.
  5. Prepare Second Side: Repeat assembly with the opposite side, but without weather stripping.
  6. Secure Assembly: Fit both sides together carefully (align channels) and secure with C-clamps, distributing pressure evenly.
  7. Pour Resin: Position the assembly with the funnel facing upward. Place a disposal bin beneath to catch spillage. Slowly pour prepared resin into the funnel until full.
  8. Cure: Wait until fully cured before disassembling. Optional: Using a vacuum chamber will remove bubbles and create a more translucent finish.
Step 4 — Finishing
  1. Disassemble: Carefully separate the mold and remove the knife. Keep the knife guard in place.
  2. Trim Excess: Use a Dremel or file to remove excess resin from the handle.
  3. Sand Smooth: Sand all surfaces until smooth (coarse grits first, finish with fine).
  4. Fill Air Pockets: Fill any visible voids with additional resin and cure.
  5. Final Sand & Finish: Sand again for smoothness, then apply wax coating.

Final Product

The result is a durable, high-quality adaptive chef’s knife with a permanent, ergonomic handle that can be easily replicated for clients with similar mobility needs. The tessellated design provides strength while minimizing material, and the resin coating ensures a clean, long-lasting finish.

Would you like to order a product?